Worldforge

Your World.
Alive.

How Worldforge Works

A complete guide to every feature — from creating your first world to playing inside it. Worldbuilding, combat, NPCs, quests, building, character customization, AI generation, and everything in between.

PaladinPriestDwarfElf ScoutSwordswomanFire WitchHerbalistSkeletonUndead
01

Creating a World

When you create a new world, you have two options:

AI Generation

Describe a concept — like “a dying world where the last city floats above an ocean of ash” — and the AI generates everything: a world name, description, 8-12 entities (characters, locations, factions, artifacts, species), a timeline with multiple eras and events, and all the relationships between them. It takes about 30 seconds.

Everything is editable. AI gives you a starting point. You can change names, rewrite backstories, delete things you don't like, and add new content. Nothing is locked.

Build Manually

Start with an empty world and build everything yourself. Create entities one by one, write their lore, define relationships, add timeline events, and organize everything into eras. Full control from the start.

You can also mix both approaches — generate a world with AI, then manually add, edit, or remove whatever you want.

02

Entities

Entities are the building blocks of your world — every person, place, group, object, creature, and major event. There are six types:

Characters

The people in your world. Heroes, villains, rulers, merchants, rebels. Each gets a full profile page with backstory paragraphs, custom facts (like “Age: 34” or “Title: Exiled Prince”), and tags for filtering.

Locations

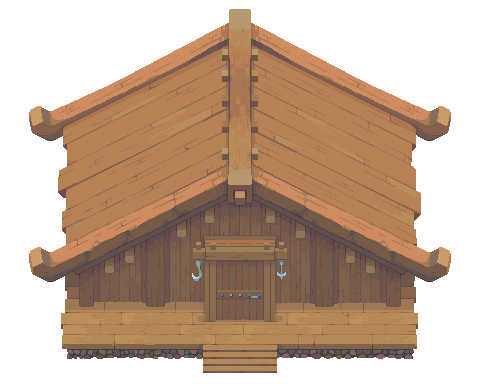
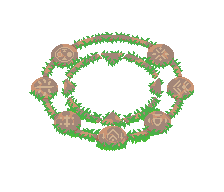
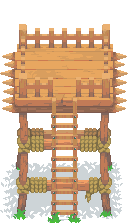
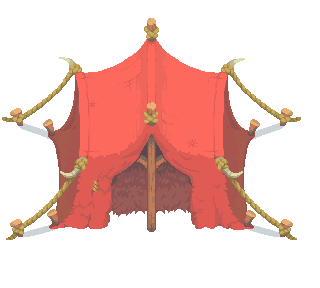
Cities, mountains, ruins, taverns, temples — anywhere that matters. They appear as markers on the map and in Explore mode.

Factions

Organized groups with shared goals. Kingdoms, guilds, cults, rebel alliances. Factions can own territory on the map.

Artifacts

Important objects. A legendary sword, a cursed ring, a sacred scroll — items that matter to your lore.

Species

Races and creatures. Elves, dragons, sentient mushrooms — whatever lives in your world.

Events

Major occurrences treated as entities — a war, a plague, a discovery. These also appear on the timeline.

Each entity page includes: lore paragraphs, custom key-value facts (like a wiki infobox), tags, a history timeline showing every event they were involved in, their connections to other entities, and for characters — an AI Storytelling toggle.
03

Relationships

Relationships are connections between any two entities. “Kael leads The Iron Guard.” “The Sunblade was forged in Mount Ashara.” “The Northern Kingdom is allied with The Merchant Guild.”

You define who or what is connected and write a short label describing the connection. Relationships are bidirectional — if Kael leads The Iron Guard, you'll see that link from both entity pages.

All connections get visualized on the Connections page — an interactive visual map where every entity is a dot and every connection is a line. Hover over any entity to see its connections light up while everything else dims. Click one to go to that entity's page.

Connections over time: Connections can have a “formed era” and “dissolved era.” When you use the era filter on the Connections page, only connections that existed during that era are shown. So you can see how alliances and rivalries changed over time.
04

Timeline & Eras

The timeline is your world's history — a chronological list of events grouped by era.

Eras

Eras are time periods that divide your history. Think “The First Age,” “The Age of Ruin,” “The Modern Era.” Each era has a title, a description, a color, and a date range (like “Year 0 – Year 340”). They're shown as colored segments on the era filter — a timeline bar that appears at the top of the Map and Connections pages.

Events

Events are things that happened. A battle, a coronation, a natural disaster. Each event has a title, date label, summary, description of how it changed the world, and which entities were involved (with roles like “victor,” “founder,” or “casualty”).

Cross-linking

Every event on the timeline has two action buttons:

  • Show on Map — jumps to the Map page and highlights the entities involved with a gold glow, auto-panning the camera to them.
  • Show in Graph — jumps to the Graph page and highlights the involved nodes while dimming everything else.

This lets you seamlessly move between views: read about a battle on the timeline, see where it happened on the map, then see who was involved on the graph.

05

Ways to See Your World

These are three different ways to see your world. They're all reading the same data but showing it differently.

Explore Mode (Playable Game)

Explore mode is a full 2D game inside your world. It generates procedural terrain and turns your world into a playable experience with multiple zones, NPCs, combat, quests, building, vendors, and economy. Move with WASD or arrow keys, attack with SPACE, interact with E, and build with B. See the Gameplay section below for full details.

World Map

A bird's-eye view of the same terrain. You can see all entity markers at once, zoom and pan freely, and use the search to find specific entities. The map also supports:

  • Regions — Draw named polygon regions on the map (like countries on a real map).
  • Territories — Assign which faction owns each region during each era. When you scrub through eras, you see ownership change.
  • Event highlighting — When you click “Show on Map” from the timeline, the involved entities get highlighted with a pulsing glow.
  • Era filter — Filter the map by era. Entities that didn't exist yet (or have been retired) disappear.

Connections

An interactive visual map showing every entity as a dot and every connection as a line. Dots are color-coded by entity type. Hover to highlight connections, click to navigate. The era filter hides entities and connections that don't exist during the selected era.

06

Gameplay

Every world you create is a playable 2D game. Explore mode isn't just a viewer — it's a full game with combat, NPCs, quests, vendors, economy, and progression. Here's everything that's in the game:

Zones

There are three explorable zones, each with different gameplay:

  • Hub Zone — Your home base. A 140×105 tile map with a merchant, campfire (heals you), well, ruins, and 8 named townsfolk NPCs. Complete objectives here to unlock paths to other zones.
  • Grassland — A wilderness zone (80×60 tiles) accessed through the Northern Pass. Contains orc warriors, a vendor camp, shrine, 8 points of interest, and a full combat mission chain.
  • Seaside Village — A peaceful zone (40×30 tiles) accessed through the Docks South Gate. Contains 6 named NPCs with dialogue, Witch Willow's potion shop, quests, bandits, and wildlife.
CabinWellPlayer
TreeOrcShrine
StallNPCHerbalist

Combat

Press SPACE to attack in the direction you're facing. Enemies have AI behavior states: idle, chase, attack, hurt, and death. Damage numbers float above targets. You earn gold from kills.

  • Orc Warriors — 6 warriors + 1 shaman in the grassland, 2 color variants
  • Bandits — 4 hostile enemies in the village zone
  • Shrine Buff — Clear nearby orcs, press E to activate: +50% damage, −20% damage taken for 45 seconds
  • Death — You lose gold and respawn at the hub
Orc Warrior
−12+25 HP
PlayerOrc 2

NPCs & Dialogue

25+ named NPCs appear across all zones with E-key interaction. Each NPC has progression-aware dialogue — what they say changes based on what you've done. Press 1, 2, or 3 for dialogue choices.

  • Hub Townsfolk: Marta (Baker), Finn (Dockhand), Lina (Shepherd), Oswald (Scholar), Ada (Innkeeper — heals you), Rook (Courier), Edith (Elder), Dale (Lookout)
  • Building Residents: Helena (Tavern Keeper — quest + heals), Marcus (Archivist — quest), Greta (Healer), Barton (Guard Captain — quest), Pip (Trader), Elara (Scholar), Corwin (Builder — quest), Nessa (Caretaker)
  • Village: Fiona (food shop), Gerald (general shop), Elder Rowan (lore), Marina (quest), Tom (area info), Nana Rose (tea heal), Witch Willow (potions + fortunes)
  • Guards: Varn and Drell at the grassland entrance

Quests

NPCs give you quests with gold and resource rewards. Quest progress persists across zone transitions and sessions.

  • Grassland Mission — Visit 5 points of interest → Kill 7 orcs → Open reward chest (+75 gold)
  • Marina's Lost Necklace — Search 3 spots → Find necklace → Return (+30 gold + chest +25 gold)
  • Helena's Firewood — Gather 5 wood for the Tavern Keeper (+15 gold)
  • Marcus's Survey — Discover 5 landmarks for the Archivist (+20 gold)
  • Barton's Orc Hunt — Defeat 7 orcs for the Guard Captain (+25 gold)
  • Corwin's Building Goal — Place 10 buildings for the Builder (+10 gold, +8 wood, +5 stone)
  • Lina's Lost Sheep — Talk to Lina → Find sheep near eastern docks → Return (+20 gold)
  • Rook's Message — Talk to Rook → Deliver message to Elder Rowan in village (+25 gold)

Vendors & Economy

Gold comes from combat kills, quest rewards, and loot chests. Spend it at vendors:

  • Hub Merchant — General goods
  • Grassland Vendor — Health Potion (15g), Strength Tonic (25g), Iron Shield (40g)
  • Village shops — Fiona (food), Gerald (general goods)
  • Witch Willow — Barrier Hex (30g), Third Eye (20g), Vigor Brew (25g)

Health potions auto-heal on purchase. Buff items have duration effects.

Character Customization

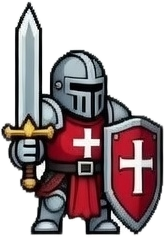
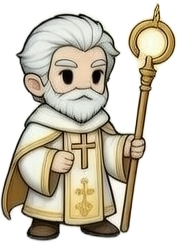
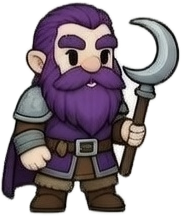
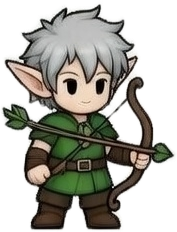
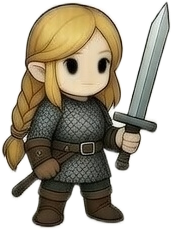
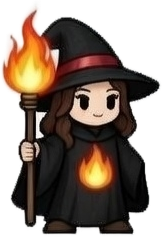
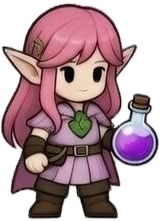
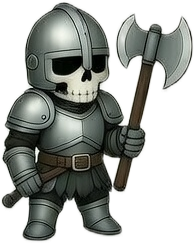
Press C to open the character picker. Choose from 28 playable characters across two categories:

  • Townsfolk — 19 animated characters with walk cycles (farmer, merchant, knight, mage, and more)
  • Fantasy Heroes — 9 detailed characters (Paladin, Priest, Dwarf, Elf Scout, Skeleton, Swordswoman, Fire Witch, Herbalist, and more)

Each character can be recolored with a hue-shift slider or preset color swatches — giving you hundreds of visual combinations. You can also set a custom display name (up to 20 characters) that appears above your character in the world.

PaladinPriestDwarfElf ScoutSwordswomanFire WitchHerbalistSkeletonUndead

Wildlife & Ambient

Passive animals wander the world: sheep in the hub and grassland, wildlife in the village. Birds, butterflies, frogs, ducks, and nature particles add atmosphere. Campfire smoke, chimney smoke, animated lamps, and fireflies bring the world to life.

07

Building System

World owners can place structures in their world. Press B to open the build menu.

How it works

  1. Press B to open the build menu.
  2. Choose a category: Structures, Props, or Decoration.
  3. Select an item. A placement gizmo follows your cursor.
  4. Press R to rotate (0° / 90° / 180° / 270°).
  5. Click to place. The item costs materials (wood, stone, or gold).

Materials

  • Wood — Start with 30. Used for huts, fences, market stalls.
  • Stone — Start with 15. Used for walls, towers, wells.
  • Gold — Earned in-game. Used for premium items.

Rules

  • Can only place on walkable tiles
  • No overlapping with existing objects
  • Cannot place near zone gates
  • Placed objects block movement (rotation-aware footprint)
  • All placements are saved to the database and loaded when you enter the world

Building Residents

Buildings you place attract named NPC residents who move in and become part of the world. Each resident has a unique role, dialogue that reacts to your progress, and some offer quests:

  • Helena (Tavern Keeper) — Heals you and offers a firewood gathering quest
  • Marcus (Archivist) — Tracks your discoveries and offers a survey quest
  • Greta (Healer) — Heals you when hurt
  • Barton (Guard Captain) — Offers an orc hunting quest
  • Pip (Trader) — Comments on the economy and your progress
  • Elara (Scholar) — Shares lore and research about your world
  • Corwin (Builder) — Offers a building milestone quest
  • Nessa (Caretaker) — Watches over the settlement
CabinTowerTentWallBarrelFence
22 buildable items across 3 categories. Only the world owner can build — visitors can see placed objects but can't modify them. Building milestones at 5, 10, 20, and 30 structures trigger celebration banners.
08

AI Storytelling

This is where your world starts to feel alive. AI Storytelling lets the AI write what happens to one of your characters — generating stories as if the character is living their life while you're away.

How to enable it

  1. Go to any Character entity's page (it must be a Character type — not locations, factions, etc.).
  2. Scroll down to the sidebar — you'll see “AI Storytelling” in the sidebar.
  3. Click “Start AI Storytelling.”
  4. Write a personality prompt — describe how the AI should play this character. For example:“Cautious and intellectual. Driven by duty but privately doubts the Council's decisions. Prefers diplomacy over force.”
  5. Write constraints — what the AI should NEVER do. For example:“Never kill other characters. Don't leave the city. Don't reveal the secret of the Codex.”
  6. Click “Start.”

What happens next

Once a session is active, click “Write Next Story” to have the AI generate a story — a short narrative about what the character did. The AI reads the character's full context: their backstory, personality, relationships, history, other characters in the world, locations, and your constraints. Then it writes something appropriate — a journal entry, an encounter, a discovery, a conversation.

Session controls

  • Write Next Story — generates one story immediately.
  • Pause — temporarily stops the session. You can resume anytime.
  • Stop AI Storytelling — permanently ends it. You can start a new one later.
Important: Nothing the AI generates is automatically official. Every story goes to a review queue where you decide what becomes part of your world. You stay in full control.
09

Story Review

The Story Queue page is where AI-generated stories land — each with a “Pending” status, waiting for you to decide what happens.

What's in a story?

Each story has a type (Journal, Encounter, Travel, Conversation, Discovery, Rumor, Relationship Shift, or Minor Event), a title, the full narrative text, and optionally proposed changes — things the AI suggests should become official, like:

  • New connections — “Kael now mistrusts The Tide Council”
  • New facts — “Carries a smuggler's map of the Rust Shallows”
  • New tags — “explorer,” “outcast”

Your options

  • Approve — accepts the story. Any proposed changes (new connections, facts, tags) get applied to the actual entity data.
  • Approve with Note — lets you add a note about what you changed, then approves it.
  • Reject — discards the story. Nothing changes in your world.
The Overview page shows a badge when there are pending stories, so you always know when something needs your attention.
10

Sharing & Visibility

Every world starts as Private — only you can see it. When you're ready to share:

  1. Go to Settings in your world.
  2. Change visibility to Public.
  3. Your world appears on the Discover page for anyone to browse.

Public worlds are fully explorable — visitors can view all entities, explore the map, browse the graph, read the timeline, and walk through explore mode. They just can't edit anything.

Ready to play?

Create a world in 30 seconds with AI, then walk in and play. Or start from scratch.